If you’re anything like me, one of the main draws to making music is the opportunity to process your thoughts and feelings. Also if you’re anything like me, the past few months have supplied more thoughts and feelings than you know what to do with, and you may just now be catching your breath and feeling ready to create and record again. So what now?
If you’re a musician in the Salt Lake City, Utah area, I would of course recommend you contact us about safely booking studio time, if you’re comfortable operating under our new COVID guidelines. If this isn’t possible for you, you’ve got options! An increasingly popular method our clients have been using is to have us professionally mix your home-recorded music. While nothing beats actually getting into the studio, this is a great way to have your music recorded and still sound professional. Over the next little while, we’ll be posting a series of home recording tips with more in-depth insight into audio related terms and techniques. For now, let’s go over the basic things you’ll need to get your home recordings started and ready to be mixed.
Computer

Mac or PC? Who cares! If you are interested in using Logic Pro or Garageband, you will need a Mac since those softwares are developed and distributed by Apple (check the App Store). Otherwise, work within whichever operating system you feel comfortable with. Note to Linux nerds: your options are further limited.
If you’re not a computer savvy person, there are some hardware recording options still available, though they make doing much with those recordings far more cumbersome.
Recording Software

You’ve probably heard of a few already like Pro Tools, Ableton, Logic Pro and Garageband. But there are tons of softwares available, and quite a few are really quite good. One of the main things to consider when purchasing software though, is if you plan on collaborating with others, and if so, what software are those others using? While there are ways to navigate collaborating with different softwares, you’re really doing yourself a massive favor to try and get on the same software as your fellow collaborators.
FYI: If you are planning to have us mix your DIY home recordings, we use all 4 of the softwares mentioned above.
Audio Interface

The Focusrite Scarlett is one of several great audio interface options.
This is essentially what enables you to connect studio recording equipment to your computer. There are a wide variety of audio interfaces boasting varying degrees of audio quality and cool features, which we’ll dive more deeply into with a future post. For this post though, let’s stick to a beginner’s guide.
Audio interfaces connect to your computer using either a USB or Thunderbolt port. You’ll need to know which ports your computer offers to make sure you buy the right thing. If you’re looking for an entry-level unit like the wildly popular Scarlett range by Focusrite, expect a USB port.
The next thing you’ll want to figure out is how many inputs you want. A device’s input count determines what and how many pieces of audio equipment you can plug in at one time. Most manufacturers get tricky and will boast an interface with 18 inputs, but perhaps only 4 of those inputs can accommodate a microphone or guitar. If you’re not planning on live recording drums, you should only need one or two inputs at a time.
Microphone

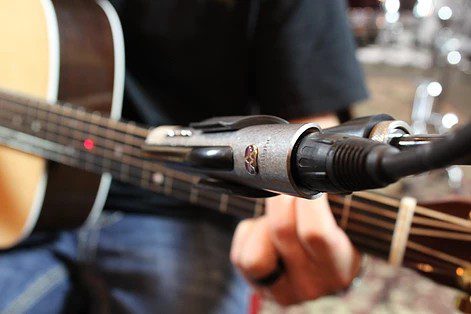
Small diaphragm condensers are great for recording Acoustic Guitar.
Microphones are essential for any DIY home recording unless you’re recording a synth-only project without any vocals, which if you are, feel free to skip this segment. Maybe go watch Will Ferrell and Rachel McAdams in Eurovision Song Contest: The Story of Fire Saga. That’s not a paid reference or anything, I just think you’d enjoy it.
Now that the synth band is distracted, I’d like to fill the rest of you in on microphones. You’ve got a bevy of options out there, and your usage will really determine what microphone you reach for first. For the first time home recording champ, I’d recommend an inexpensive large diaphragm condenser, like the SE Electronics X1A. At a super affordable $100 price point, you’ll be hard pressed to find a better deal on a do-it-all type microphone.
Don’t forget the accessories! Most microphones do not include necessary accessories like a stand, XLR cable, or pop filter.
Headphones

Anything you have on hand will work, but a dedicated set of closed-back reference headphones are really what you want. Closed-back headphones will help prevent the sound from your headphones bleeding into your microphone while you’re recording.
If you’re planning on using whatever pair you have lying around your house, you’ll probably need an 1/8″ to 1/4″ TRS adapter in order to plug your headphones into your interface. You can pick one up for a couple bucks at virtually any music shop.
Honorable Mention

While not essential to recording at home, if you plan on recording any software-based instruments, you’ll need to pick up a MIDI controller as well.
And that’s it! Hopefully you’re able to find some release in creating music at home. When you’re ready to have us mix your stuff, please email us at: [email protected].
Take care!
Recent Comments